> For the complete documentation index, see [llms.txt](https://docs.diaflow.io/llms.txt). Markdown versions of documentation pages are available by appending `.md` to page URLs; this page is available as [Markdown](https://docs.diaflow.io/workspace/community/how-to-create-your-community-profile.md).
# How to Create Your Community Profile
To start sharing your workflows and connecting with others, you need to set up your Community Profile. This acts as your public creator page.
#### 1. Access the Profile Setup
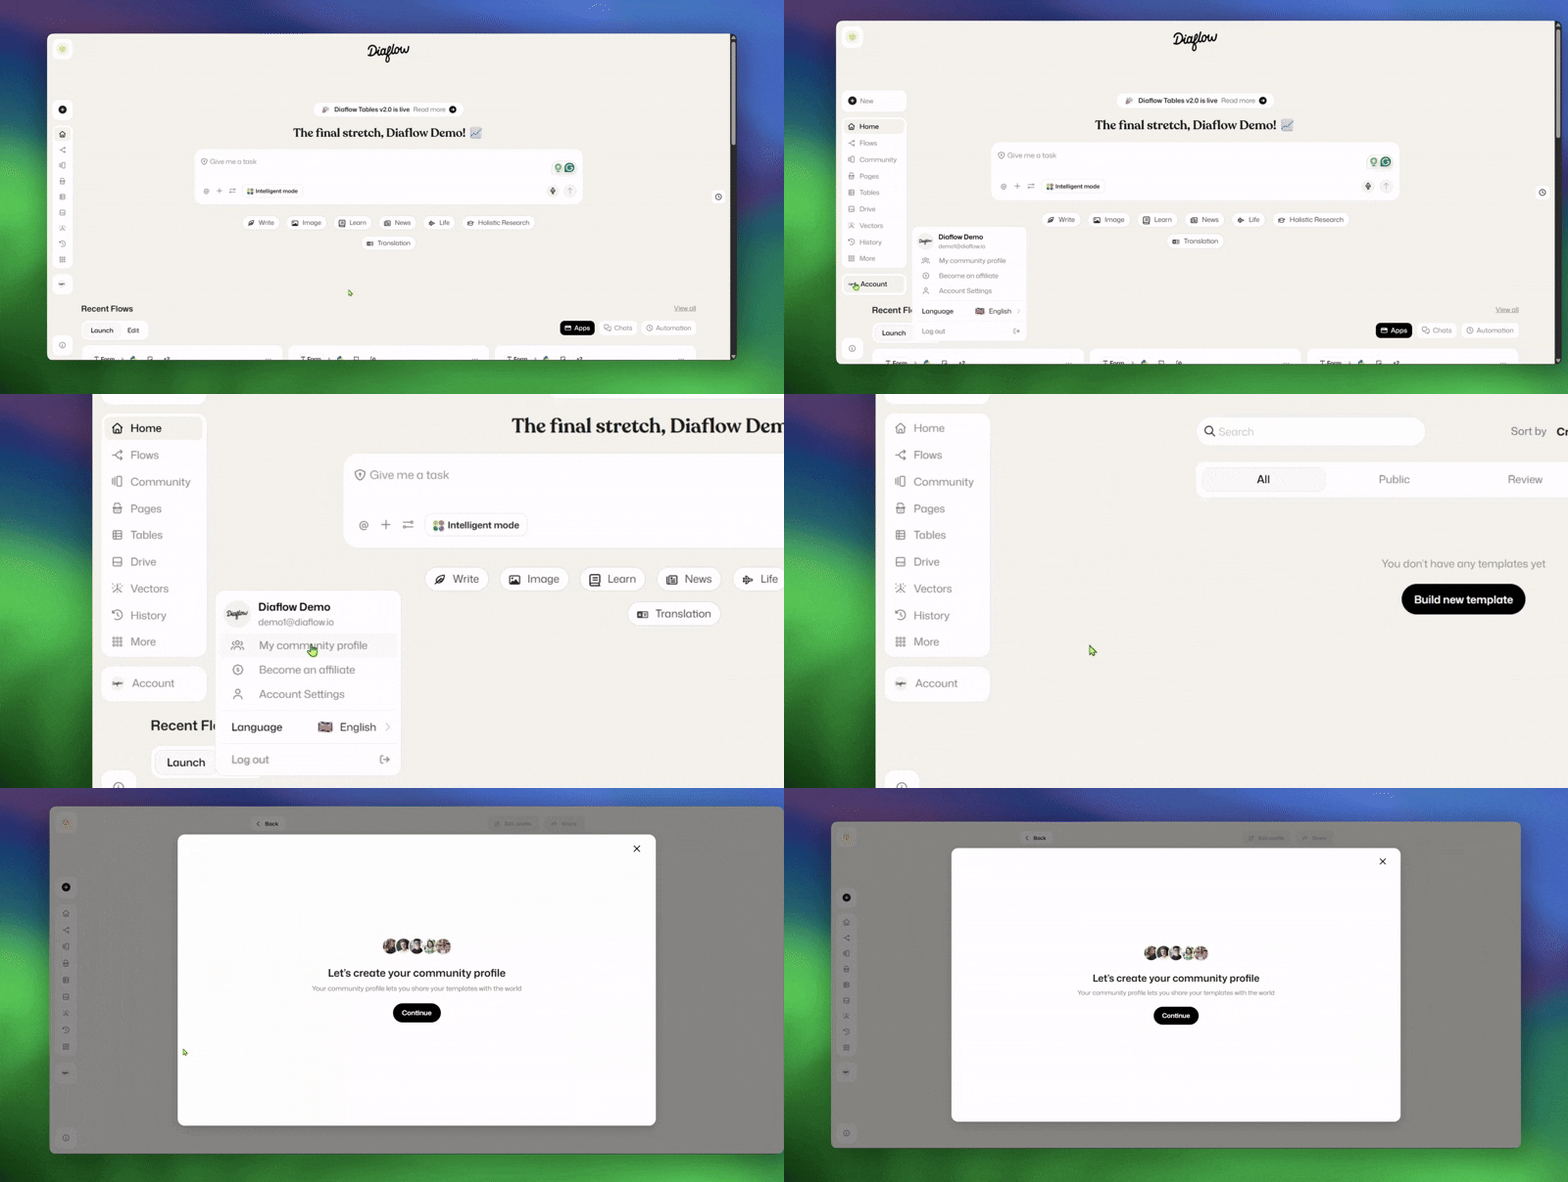
To begin, click the **Account** button at the bottom of the left sidebar. From the dropdown menu, select **My community profile**.
#### 2. Initial Onboarding
If this is your first time, a welcome modal titled *"Let's create your community profile"* will appear.
* Click the **Continue** button to proceed to the setup form.
#### 3. Complete Your Profile Details
Fill out the profile form to build your public creator identity. *(Note: You can use an email address or phone number here that is different from the one on your main Diaflow account.)*
* **Avatar & Name:** Upload your photo and enter your display name.
* **Username (Required):** This is your unique @handle. You cannot change it after setup.
* **Description:** Write a short bio about yourself.
* **Contact Info:** Enter a valid email and phone number.
* **Social Links:** Paste the full URLs for your platforms (LinkedIn, X/Twitter, YouTube, Discord, etc.) to connect with others.
Once you complete the form, select the **Is Agree** checkbox to accept the Community Guidelines, then click **Continue**.
#### 4. Finalize and Get Your Link
On the final confirmation screen, you will see your direct public profile link (e.g., `community.diaflow.io/profile/username`).
* Click **Copy link** if you want to save or share it instantly.
* Click **Complete** to finish the onboarding process.
#### 5. Welcome to Your Dashboard!
After you click **Complete**, you will be redirected to your **My Community Profile** page, where you can manage and publish your flows.
#### Need help?
* *Is your profile ready? Learn how to share your first workflow in* [*How to Create and Publish a Template.*](/workspace/community/template/how-to-create-and-publish-a-template.md)
* *Need to manage the templates you share? See* [*Managing Your Shared Templates.*](/workspace/community/template/managing-your-shared-templates.md)
* *Want to improve your chances of approval? Review the* [*Community Template Submission Guidelines.*](/workspace/community/template/community-template-submission-guidelines.md)



.png?alt=media&token=36d83f89-6472-46bf-81ff-9787f3ba9fab)