> For the complete documentation index, see [llms.txt](https://docs.diaflow.io/llms.txt). Markdown versions of documentation pages are available by appending `.md` to page URLs; this page is available as [Markdown](https://docs.diaflow.io/workflow-builder/nodes/trigger/webhook-automation.md).
# Webhook (Automation)
Receive real-time data from another application. (Just apply with Automation)
Description
The Webhook component facilitates real-time data transmission between applications whenever a specific event occurs. In our algorithm, the webhook acts as an input, enabling our system to receive and process data instantly upon the triggering event.
## Component settings
| Parameter Name | Description |
| -------------------------------------------- | -------------------------------------------------------------------------------------------------------------------------------------------------------------------- |
| Webhook endpoint (Test URL / Production URL) |
You can copy the webhook endpoint
- Test URL: Use for the flow with status "Draft."
- Production URL: Use for the flow with status "Published."
|
| API Key |
You can choose API Key from the list of API Keys in your Workspace
Default value: API Key created by Diaflow
|
| Body | You can add a key and specify whether it is required or optional. |
## Use case
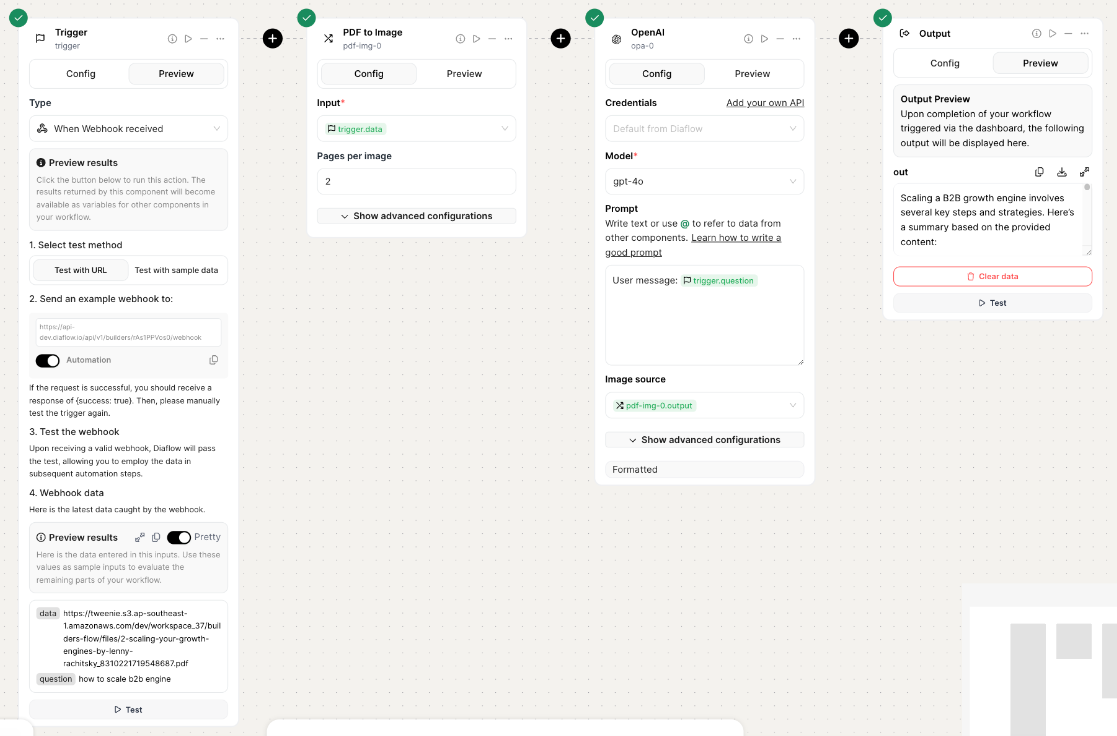
Here's a use case for the Webhook component: it is used to analyze a PDF document by asking, "*How to scale the B2B engine?*"
## How to Set up a Node Trigger Webhook
### **Step 1: Set Up the Node Trigger Webhook**
Setting up the node trigger webhook.\
In the **"Config"** tab, select **Type = "Webhook"**
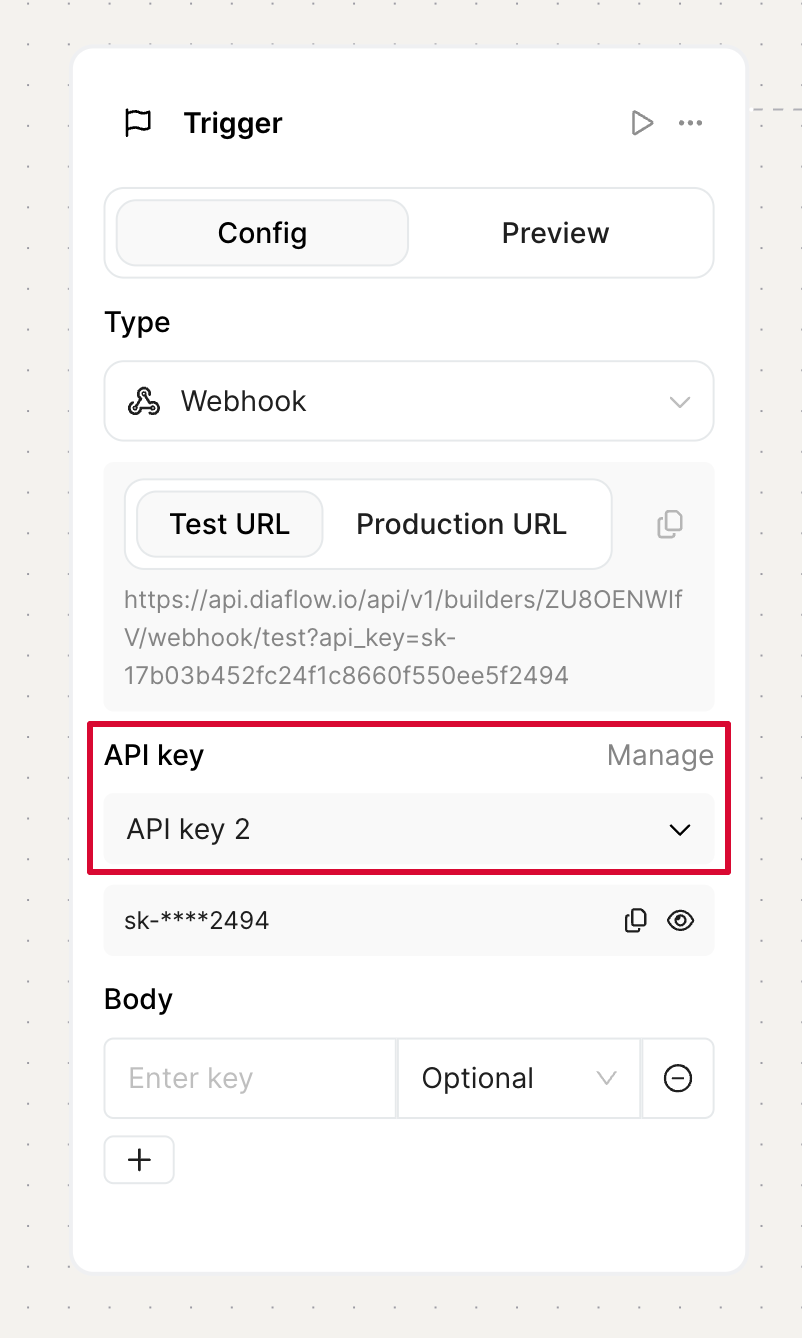
### **Step 2: Choose API Key**
Choose API Key from your API Keys List.
Make sure that your API Key is included in the header when calling the webhook. This security
measure helps protect your data and environment.
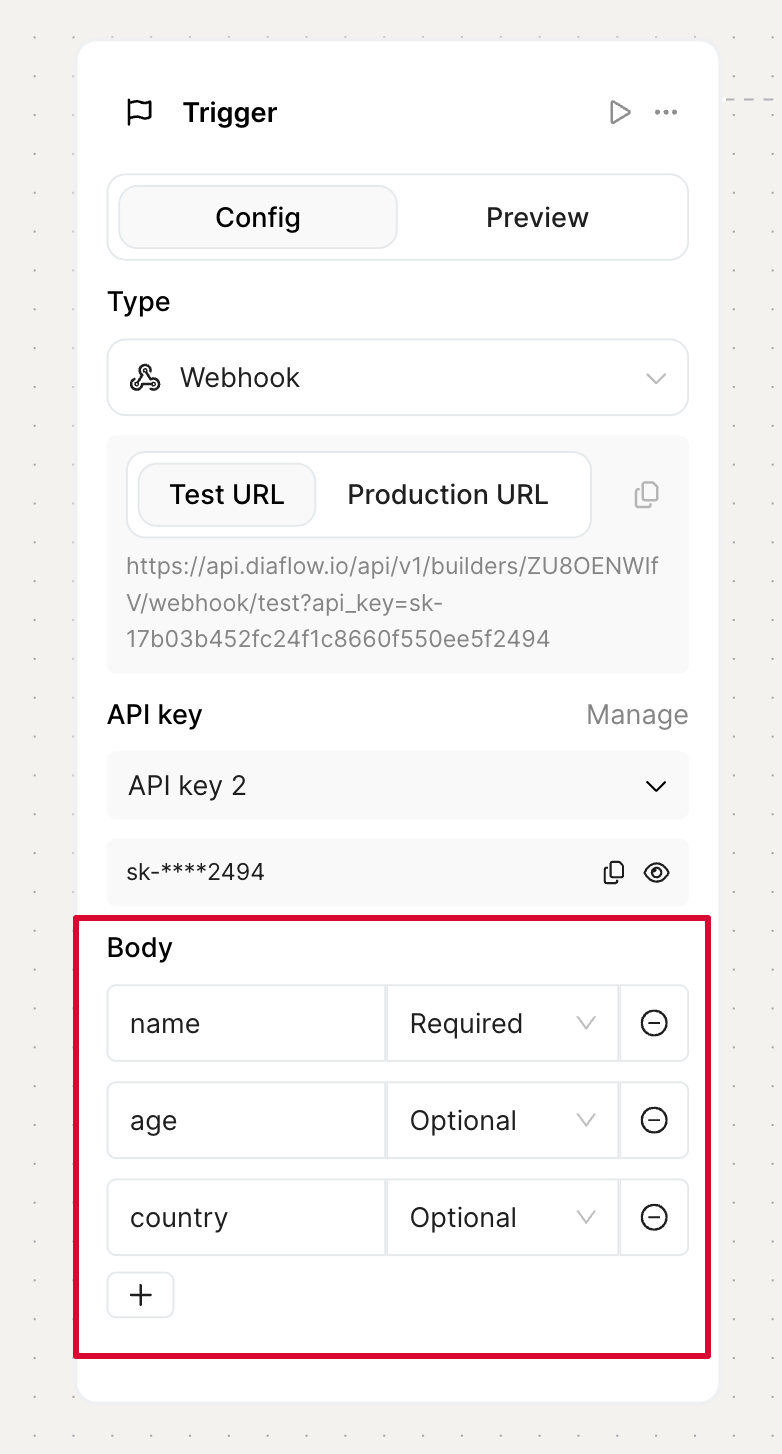
### **Step 3: Configure the Body Fields**
Enter the values in the **Body** section. These are the data fields the system will receive from the Webhook. You can mark them as **"Optional"** or **"Required"**.
**Note:** If the system receives a Webhook request that does not contain the required fields, an error will be returned.
### **Step 4: Preview the Webhook**
You can test the Webhook using one of the following methods:
**Recommendation**: Use **Postman** to preview the Webhook.
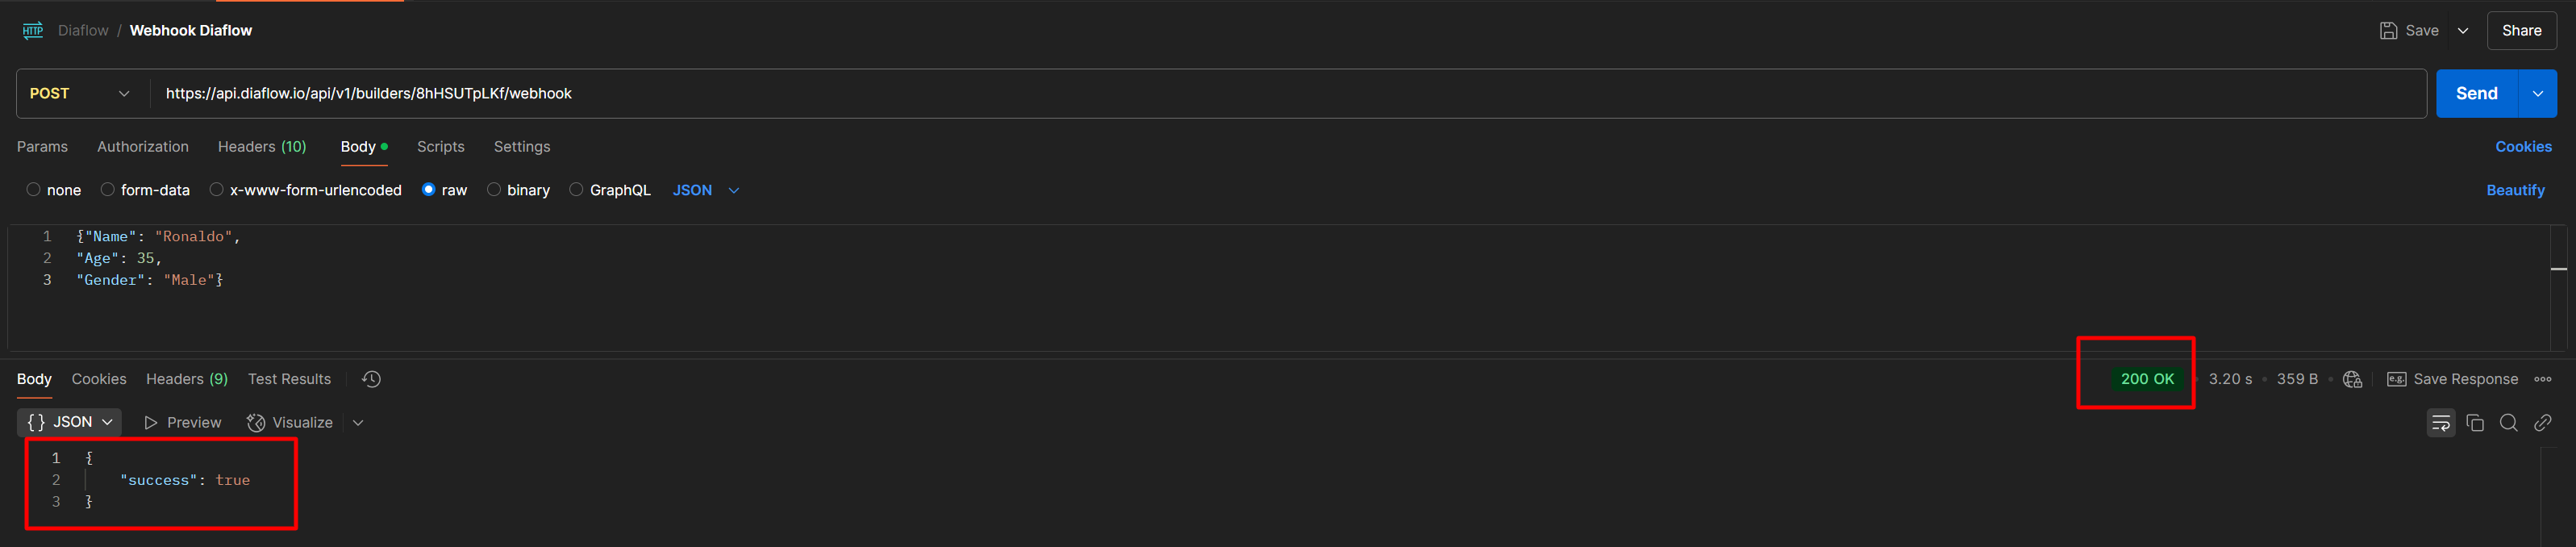
**Steps to Test with Postman**
* Copy the Webhook URL on Diaflow
* Open **Postman**.
* Use the **"POST"** method.
* Paste the Webhook URL.
* Go to the **"Body"** tab:
* Select **"Raw"** format.
* Enter the data fields (e.g., Name, Age, Gender).
* Click **"Send"**.
* If the response contains `"success": true`, the connection is successful. You can now use this Webhook configuration to transmit data.